Vault and External Secrets approach is a great way to manage and deliver secrets to your application, in a secure mode. All this feature is well described in this blog post: Manage your Kubernetes secrets with Hashicorp Vault.
External Secrets is a good controller but while using it I found some limitations:
- Can’t create any other secret different than KV format secrets
- If external-secrets deployment is deleted I will lose all my secrets associated in Vault
- If I change a secret in Vault I have to restart manually the Deployment where I associate the secret
- If the secret wasn’t created in Kubernetes due to any error, the resource ExternalSecret is still created
Well, I have great news, ALL these limitations are covered by another controller, that can be named as a replacement for External Secrets.
And that is Vault-CRD operator.
Introducing Vault-CRD
Vault-CRD is an operator created by a german engineer named Björn Wenzel. It was written in Java and open-sourced by the creator under Apache 2 license. It works in a very similar way like External Secrets and here is well and easily explained.
Here you can see the resources to know more about the tool:
Also this project is mentioned in Vault Related tools: https://www.vaultproject.io/api/relatedtools
This post outlines a process to use Vault-CRD within Kubernetes to retrieve secrets from Vault, replacing External Secrets.
I’ll divide this into 3 different sections:
- Configuring Vault-CRD to talk with Vault
- Installing Vault-CRD using the helm chart
- Creating a secret from Vault-CRD
Prerequisites:
- A kubernetes cluster (or more)
- A Vault service on Kubernetes up and running
Tools used:
1. Configuring Vault-CRD to talk with Vault
It is well explained in the documentation, anyway, here we are going to show the configuration using Kubernetes Service Account authentication method:
It is first necessary to create in the cluster an initial service account with a clusterrolebinding
Create all these first resources in default namespace
kubectl create serviceaccount vault-auth -n defaultcat <<EOF | kubectl apply -f -
apiVersion: rbac.authorization.k8s.io/v1beta1
kind: ClusterRoleBinding
metadata:
name: role-tokenreview-binding
namespace: default
roleRef:
apiGroup: rbac.authorization.k8s.io
kind: ClusterRole
name: system:auth-delegator
subjects:
- kind: ServiceAccount
name: vault-auth
namespace: default
EOFNow you must enable the Kubernetes auth method and use the generated Service Account to configure the reviewer handling. This allows Vault to verify the JWToken used by Vault-CRD to authenticate. You need Vault Cli for that.
$ export VAULT_ADDR=<your_vault_http_url>
$ export VAULT_TOKEN=<your_vault_root_token>
$ vault auth enable kubernetes
$ vaultSecretName=$(kubectl get serviceaccount vault-auth -o json | jq '.secrets[0].name' -r)
$ kubectl get secret $vaultSecretName -o json | jq '.data["ca.crt"]' -r | base64 -d > ca.crt
$ vault write auth/kubernetes/config \
		token_reviewer_jwt="$(kubectl get secret $vaultSecretName -o json | jq .data.token -r | base64 -d)" \
		kubernetes_host=<your_kubernetes_host> \
		kubernetes_ca_cert=@ca.crt
Don’t forget to change the values between <> for the values of your Kubernetes and Vault. Take note of following value: vaultAuthPath=kubernetes you will need it in Vault-CRD installation.
The last step is to generate a policy and generate a vault role that binds the secret for the Service Account to the policy:
- Create a file called policy.hcl with the following content:
path "backend/data/*" {
	capabilities = ["create", "read", "update", "delete", "list"]
}
This defines a new policy that has access to a secret path and has full access to it. To write this policy to HashiCorp Vault please run the following command:
$ vault write sys/policy/mypolicy policy=@policy.hcl- Generate a role to bind this policy:
vault write auth/kubernetes/role/vault-role \
	bound_service_account_names=vault-crd-serviceaccount \
	bound_service_account_namespaces=vault-crd \
	policies=mypolicy \
	ttl=1h
Take note of the following values:
RoleName=vault-roleServiceAccountName=vault-crd-service-accountServiceAccountNamespace=vault-crdYou will need all these information for the installation of Vault-CRD.
2. Installing Vault-CRD using the helm chart
First clone the chart’s repository:
git clone https://github.com/DaspawnW/vault-crd-helm.git
cd vault-crd-helm/vault-crd
Add the helm chart repository
helm repo add vault-crd https://raw.githubusercontent.com/DaspawnW/vault-crd-helm/masterNow is time to check the values.yaml file, where I will explain some things:
- Here is necessary to add your Vault URL. Is mandatory the /v1 at the end
# Please specify here the URL to your Vault installation. Don't forget to set the /v1/ path e.g. https://craftech.io:8080/v1/
vaultUrl: https://your-vault-url/v1- Now comes the configuration of the method that Vault-CRD will use to communicate with Vault. Two types of authentication methods are allowed according to documentation: Static Vault Token or Service Account. The Vault Token configuration is easier but it has the problem that you will have to renew that token periodically as you can’t create an eternal Vault Token. So we will be using the service account config.
# Specifies the used authentication method the following values are allowed: token | serviceAccount
  vaultAuth: serviceAccount

  # If you use the Service Account approach for Vault authentication please specify here the Vault role. Required if vaultAuth = serviceAccount
  # Here put the vault-role name you created before
  vaultRole: vault-role

  # Path to authentication backend in HashiCorp Vault. Only used if vaultAuth = serviceAccount
  vaultAuthPath: kubernetes
Other values are not mandatory but you can check the values file to customize your installation.
With all finished install the chart:
helm install --name vault --namespace vault-crd vault-crd/vault-crd --create-namespace3. Creating a secret from Vault-CRD
Now is time to create a Kubernetes Secret from our Vault. In this example we are going to create a secret form a Vault KV2 secret engine. You can do it from the web.

Then select KV secret engine, after that name it and give it the version 2

Remember that you need to create the secret according with the name you defined in the policy.
Now create any secret.
After this, you need to create the CRD Vault in your kubernetes cluster.
You can create a file called vault-secret.yaml and apply it later.
apiVersion: koudingspawn.de/v1
kind: Vault
metadata:
	name: backend
spec:
	changeAdjustmentCallback:
	  name: backend
    type: deployment
  path: backend/api
  type: KEYVALUEV2
After apply it you will see it in the cluster with kubectl get vault command:
$ kubectl get vault
NAME       AGE
backend    8s
You can see the secret created:
$ kubectl get secrets
NAME                             TYPE                                  DATA   AGE
backend                          Opaque                                0      36s
Now you can use it in a deployment mounting the secret content as envars for your app.
envFrom:
- secretRef:
	name: backend
changeAdjustmentCallback option
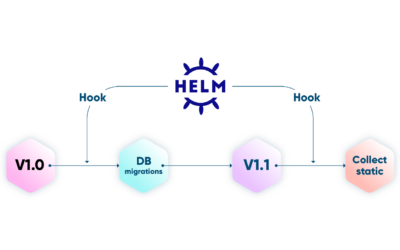
That’s one of the best parts of this controller. As you saw in the Vault CRD definition, you can define a deployment that will be restarted if something changes in the vault secret. So you just need to update you secret in Vault. All the stuff to get the new value in your deployment will be automatically done.
For more information of this feature, go here.
Admission Webhook
This is another great feature, that need configuration from the values.yaml file of the chart, when installing the controller.
You can check more information about it here.
Conclusion
- This controller is a better option than External Secrets to manage the secrets from Vault Resource
- One bad point is that the creator is not being active in the development of the Controller since 3 months ago, so maybe if you want new features, or detect some bugs, you will need to wait until the community helps or you will have to check it by yourself. Anyway following this blog post you will have the controller working like a charm.
Questions?
Please feel free to join us on Craftech’s community Slack and ask any questions.