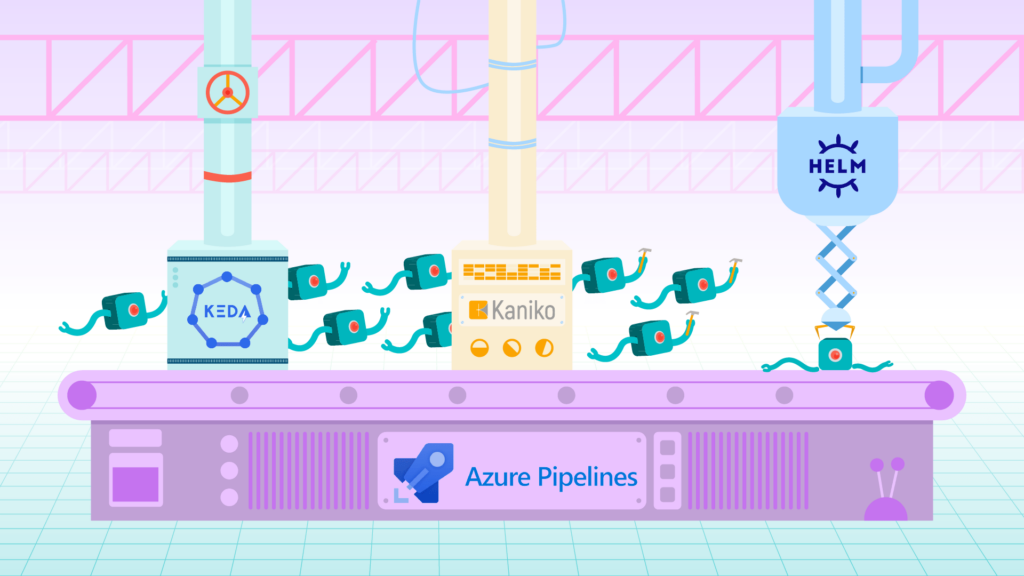
The following document details how to create an azure self-host agent, deploy it in a kubernetes cluster and use it in a CICD Azure pipeline using Azure DevOps code. Kaniko is used for building and caching images in an ECR repository, helm for upgrading microservices and KEDA for scaling agents from a job queue.
The agents are centralized in a management cluster and their configuration allows them to be used in other clusters such as development and production.
We show the use of different tools to take advantage of the full use of the self-host agent without the need to use Azure’s own agents.
The following tutorial was implemented using AWS services such as ECR, S3 and EKS so some explanations are AWS specific.
Preliminary Definitions
Azure Pipelines
Azure Pipelines (1) automatically build and test code projects to make them available to others. It works with any language or project type. Azure Pipelines combine continuous integration (CI) and continuous delivery (CD) to test and build your code and ship it to any target.
Azure Agents
When your pipeline runs, the system begins one or more jobs. An agent (2) is computing infrastructure with installed agent software that runs one job at a time.
Jobs can be run directly on the host machine of the agent or in a container:
Microsoft-hosted agents:with Microsoft-hosted agents, maintenance and upgrades are taken care of for you. Each time you run a pipeline, you get a fresh virtual machine for each job in the pipeline. The virtual machine is discarded after one job -which means any change that a job makes to the virtual machine file system, such as checking out code, will be unavailable to the next job.Self-hosted agents:an agent that you set up and manage on your own to run jobs is a self-hosted agent. Self-hosted agents give you more control to install dependent software needed for your builds and deployments. What has to be paid is just the cost of resolving parallel jobs.
Agent Pool
An agent pool (3) is a collection of agents. Instead of managing each agent individually, you organize agents into agent pools. When you configure an agent, it is registered with a single pool, and when you create a pipeline, you specify the pool in which the pipeline runs. When you run the pipeline, it runs on an agent from that pool that meets the demands of the pipeline.
Kaniko
Kaniko (4) is a tool to build container images from a Dockerfile, inside a container or Kubernetes cluster. It doesn’t depend on a Docker daemon and executes each command within a Dockerfile completely in user spaces. This enables building container images in environments that can’t easily or securely run a Docker daemon, such as a standard Kubernetes cluster.
Keda
KEDA (5) is a Kubernetes-based Event Driven Autoscaler. With KEDA, you can drive the scaling of any container in Kubernetes based on the number of events needing to be processed.
Kubernetes – ServiceAccount
When services are deployed in a cluster they run as pods which make calls to the Kubernetes API as a user would. When they make these calls they do so by authenticating themselves, that is why there are serviceAccounts. The serviceAccount is used to give an identity to the objects in Kubernetes. When deploying an application if one does not define a serviceAccount the pod will use the default one.
IAM Roles – Policies
An IAM role (6) is an IAM identity that you can create in your account that has specific permissions. An IAM role is similar to an IAM user, since it’s an AWS identity with permission policies that determine what the identity can and cannot do in AWS. A role is intended to be assumable by anyone who needs it. Also, a role does not have long-term standard credentials such as a password or access keys associated with it. Instead, when you assume a role, it provides you with temporary security credentials for your role session.
You manage access in AWS by creating policies(7) and attaching them to IAM identities (users, groups of users, or roles) or AWS resources. A policy is an object in AWS that, when associated with an identity or resource, defines their permissions. AWS evaluates these policies when an IAM principal (user or role) makes a request. Permissions in the policies determine whether the request is allowed or denied.
Prerequisites
- A kubernetes cluster (or more)
- A repository in Azure Devops
- A docker image repository such as AWS-ECR
Creation of Agent Pools
As we mentioned before, the self-host agents that we install and maintain in a cluster must belong to an Agent Pool. To meet this requirement we can use the Default or create a new Agent Pool.
Creating different agent pools allows us to divide agents by projects or environments (dev, stg, prod). This means that we can assign different resources to the agents, achieving a different performance based on what’s needed and the use we want to give them. To create a new Agent Pool you can follow the following documentation (3).
User configuration
To register an agent to an Agent Pool it is necessary to create a personal access token (PAT) so the user must have the necessary permissions in the Agent Pool.
It is recommended to create a user that has permissions and is used only to manage Agents Pools and agents. This is important since the agents will use a personal token and cannot be linked to a specific person.
The necessary permission that a user must have in the Agent Pool is Administrator. If the user does not have permissions the agent will not register and will give the following error message:
Access denied. <User> needs Manage permissions for pool <Agent-Pool-name> to
perform the action. For more information, contact the Azure DevOps Server
administrator.
To give it administrator permissions, the user must be added in the following tab:

Creation of PAT (Personal Access Token)
Azure Devops allows you to create and use PATs (8) as an alternative to passwords. In this case we use it to register a self-host agent inside a specific Agent Pool.
To create a PAT you can take a look at the following documentation (8). The important thing to keep in mind is that the PAT must have Agent Pools (read & manage) permissions.

Creation of the Self-Host Agent
To create and configure a self-host agent, the following documentation (9) can be considered. Before starting to detail the necessary resources, the service architectures within the cluster and the AWS resources are illustrated.
Azure agent service architecture

Resources:
azure-agent (deploy):deployment to deploy the azure agent using the agent imageazure-agent (sa):serviceaccount to attach an AWS role to it to use S3 and assume roles from other accountsazure-agent (crb):clusterrolebinding to give permissions (clusterrole) within the cluster to the deployazure-agent-awsconfig (cm):configmap with aws profiles to assume roles in other accounts – multiclusterazure-agent-scaler (keda: scaledObject - crd):scaledObject to target the deploy and set min and max replicasazure-agent-pipeline-auth-trigger (keda: TriggerAuthentication - crd):trigger pointing to the secret with which KEDA can read the queueazure-agent-pipeline-auth (secret):secret with the PAT of the agent pooldocker-config (cm):configmap with login configuration for kanikoazure-agent-kaniko (sa):serviceaccount to attach an AWS role to use S3 and ECRkaniko (pod):pod to execute build tasks with kaniko, this pod is implemented from the pipeline, it is not part of the chart
AWS architecture

Resources:
kaniko-context:bucket s3 to store the context to be built by kanikoazure-agent (chart):installation of the chart in the clusterzure-agent (role):role with permissions to place objects in S3 and to assume roles in dev and prod. This role will be used by the azure-agent deploymentazure-agent-kaniko (role):role with permissions to obtain objects from S3 and use ECR. This role will be used by the kaniko podECR:container registry for docker images
Creation of Dockerfile
Azure provides an example Dockerfile to create an agent running on linux. The dockerfile can be seen in the following documentation (10).
In the Dockerfile we add the necessary tools, in this case helm, aws-cli and kubectl.
FROM ubuntu:18.04

ARG HELM_VERSION

ADD https://get.helm.sh/helm-v${HELM_VERSION}-linux-amd64.tar.gz .

# To make it easier for building and releasing pipelines to run apt-get,
# configure apt to not require confirmation (assume the -y argument by default)
ENV DEBIAN_FRONTEND=noninteractive
RUN echo "APT::Get::Assume-Yes \"true\";" > /etc/apt/apt.conf.d/90assumeyes

RUN tar xvzf helm-v${HELM_VERSION}-linux-amd64.tar.gz && \
    mv linux-amd64/helm /usr/local/bin/helm && \
    chmod +x /usr/local/bin/helm

RUN apt-get update && apt-get install -y --no-install-recommends \
    ca-certificates \
    curl \
    jq \
    git \
    iputils-ping \
    libcurl4 \
    libicu60 \
    libunwind8 \
    netcat \
    libssl1.0 \
    unzip && \
    rm -rf /var/lib/apt/lists/*

RUN curl -LsS https://aka.ms/InstallAzureCLIDeb | bash \
  && rm -rf /var/lib/apt/lists/*

# Install AWS CLI
RUN curl "https://awscli.amazonaws.com/awscli-exe-linux-x86_64.zip" -o "awscliv2.zip" && \
    unzip awscliv2.zip && \
    ./aws/install

# Install Kubectl
RUN curl -fsSLo /usr/share/keyrings/kubernetes-archive-keyring.gpg https://packages.cloud.google.com/apt/doc/apt-key.gpg && \
    echo "deb [signed-by=/usr/share/keyrings/kubernetes-archive-keyring.gpg] https://apt.kubernetes.io/ kubernetes-xenial main" | tee /etc/apt/sources.list.d/kubernetes.list

RUN apt-get update && apt-get install -y --no-install-recommends \
    kubectl

# Can be 'linux-x64', 'linux-arm64', 'linux-arm', 'rhel.6-x64'.
ENV TARGETARCH=linux-x64

WORKDIR /azp

COPY ./start.sh .
RUN chmod +x start.sh

ENTRYPOINT ["./start.sh"]- The
helmversion is configured as an argument which allows to pass the value at build time Aws-cliis used for AWS resource management andkubectlis used for managing different clusters- The Dockerfile uses the
start.shfile which is the executable that will configure and register the agent and then wait for jobs to resolve
The start.sh is also obtained from the documentation and an additional step is added to copy a configmap with the role configurations to the .aws/config directory of the agent.
#!/bin/bash
set -e

if [ -z "$AZP_URL" ]; then
  echo 1>&2 "error: missing AZP_URL environment variable"
  exit 1
fi

if [ -z "$AZP_TOKEN_FILE" ]; then
  if [ -z "$AZP_TOKEN" ]; then
    echo 1>&2 "error: missing AZP_TOKEN environment variable"
    exit 1
  fi

  AZP_TOKEN_FILE=/azp/.token
  echo -n $AZP_TOKEN > "$AZP_TOKEN_FILE"
fi

unset AZP_TOKEN

if [ -n "$AZP_WORK" ]; then
  mkdir -p "$AZP_WORK"
fi

export AGENT_ALLOW_RUNASROOT="1"

cleanup() {
  if [ -e config.sh ]; then
    print_header "Cleanup. Removing Azure Pipelines agent..."

    # If the agent has some running jobs, the configuration removal process will fail.
    # So, give it some time to finish the job.
    while true; do
      ./config.sh remove --unattended --auth PAT --token $(cat "$AZP_TOKEN_FILE") && break

      echo "Retrying in 30 seconds..."
      sleep 30
    done
  fi
}

print_header() {
  lightcyan='\033[1;36m'
  nocolor='\033[0m'
  echo -e "${lightcyan}$1${nocolor}"
}

# Let the agent ignore the token env variables
export VSO_AGENT_IGNORE=AZP_TOKEN,AZP_TOKEN_FILE

print_header "1. Determining matching Azure Pipelines agent..."

AZP_AGENT_PACKAGES=$(curl -LsS \
    -u user:$(cat "$AZP_TOKEN_FILE") \
    -H 'Accept:application/json;' \
    "$AZP_URL/_apis/distributedtask/packages/agent?platform=$TARGETARCH&top=1")

AZP_AGENT_PACKAGE_LATEST_URL=$(echo "$AZP_AGENT_PACKAGES" | jq -r '.value[0].downloadUrl')

if [ -z "$AZP_AGENT_PACKAGE_LATEST_URL" -o "$AZP_AGENT_PACKAGE_LATEST_URL" == "null" ]; then
  echo 1>&2 "error: could not determine a matching Azure Pipelines agent"
  echo 1>&2 "check that account '$AZP_URL' is correct and the token is valid for that account"
  exit 1
fi

print_header "2. Downloading and extracting Azure Pipelines agent..."

curl -LsS $AZP_AGENT_PACKAGE_LATEST_URL | tar -xz & wait $!

source ./env.sh

print_header "3. Configuring Azure Pipelines agent..."

./config.sh --unattended \
  --agent "${AZP_AGENT_NAME:-$(hostname)}" \
  --url "$AZP_URL" \
  --auth PAT \
  --token $(cat "$AZP_TOKEN_FILE") \
  --pool "${AZP_POOL:-Default}" \
  --work "${AZP_WORK:-_work}" \
  --replace \
  --acceptTeeEula & wait $!

print_header "4 Copiando configuracion multicluster"
cp -r /aws_config/ ~/.aws/

print_header "5. Running Azure Pipelines agent..."

trap 'cleanup; exit 0' EXIT
trap 'cleanup; exit 130' INT
trap 'cleanup; exit 143' TERM

chmod +x ./run-docker.sh

# To be aware of TERM and INT signals call run.sh
# Running it with the --once flag at the end will shut down the agent after the build is executed
./run-docker.sh "$@" & wait $!
Multicluster configuration
The multi cluster configuration allows you to centralize the workload of agents in a management cluster and use them to deploy services in other clusters such as development, staging or production that are in other accounts.

To implement this modality, roles and policies must be used so that the agent in management can assume roles in the other accounts and perform the desired actions. Please refer to the following documentation (11).
We show the configuration for two accounts dev and mgt . The agents are centralized in mgt and permissions are given so that it can assume roles in dev.
MGT configuration
The first thing to do is to create a policy in mgt that allows it to assume a role of the dev account.
{
    "Version": "2012-10-17",
    "Statement": [
        {
            "Effect": "Allow",
            "Action": "sts:AssumeRole",
            "Resource": "arn:aws:iam::<dev-account-id>:role/AzureAgentAccess"
        }
    ]
}
This policy is bound to the azure-agent role. This role is attached to the annotation of the serviceAccount used by the agent in mgt. This role has a trust relationship configured so that it can be assumed by the agent from inside the cluster. To configure the trust relationship an OIDC Provider is used as explained in the documentation (11).
{
    "Version": "2012-10-17",
    "Statement": [
        {
            "Effect": "Allow",
            "Principal": {
                "Federated": "arn:aws:iam::<mgt-account-id>:oidc-provider/<provider-url>"
            },
            "Action": "sts:AssumeRoleWithWebIdentity",
            "Condition": {
                "StringEquals": {
                    "<provider-url>:sub": "system:serviceaccount:<agent-namespace>:<agent-serviceaccount>"
                }
            }
        }
    ]
}
DEV configuration
In the development account, the necessary permissions must be given for the cluster. In this case a policy is created that gives full-admin permissions for EKS.
{
    "Version": "2012-10-17",
    "Statement": [
        {
            "Effect": "Allow",
            "Action": [
                "eks:DescribeNodegroup",
                "eks:ListNodegroups",
                "eks:DescribeCluster",
                "eks:ListClusters",
                "eks:AccessKubernetesApi",
                "ssm:GetParameter",
                "eks:ListUpdates",
                "eks:ListFargateProfiles"
            ],
            "Resource": "<cluster_ARN>"
        }
    ]
}
This policy binds to the AzureAgentAccess role which will have a trust relationship with the mgt account allowing that account to assume the role. The trust relationship:
{
    "Version": "2012-10-17",
    "Statement": [
        {
	    "Action": "sts:AssumeRole",
            "Effect": "Allow",
            "Principal": {
                "AWS": "arn:aws:iam::<mgt-account-id>:root"
            }
        }
    ]
}
Finally, in the dev cluster we must give permission to the role that assumes mgt so that it can perform actions within the cluster (create pods, delete deployments, etc). As we are using a cluster managed by AWS we edit the configmap aws-auth. What we need to do is to add the role’s arn.
...
- "groups":
  - "system:masters"
  "rolearn": "arn:aws:iam::<dev-account-id>:role/AzureAgentAccess"
  "username": "AzureAgentAccess"
...
Credencials ConfigMap
The configmap has the purpose of setting the configuration of ~/.aws/config with the profiles and roles that you want to assume. The form of the configmap is as follows:
apiVersion: v1
kind: ConfigMap
metadata:
  name: awsconfig-configmap
  namespace: azure-agent
data:
  config: |
    [profile mgt-env]
    role_arn = arn:aws:iam::<mgt-account-id>:role/<role-name>
    web_identity_token_file = /var/run/secrets/eks.amazonaws.com/serviceaccount/token

    [profile dev-env]
    role_arn = <arn-role>
    source_profile = mgt-env
    role_session_name = xactarget
This configMap is going to be copied to the corresponding folder when running the agent startup script.
To install the configmap:
kubectl create namespace azure-agent
kubectl apply -f awsconfig-configmap.yaml -n azure-agent
Construction of the agent’s image
To build the image and upload it to an ECR repository (12) we use the following commands:
docker build -t azure-agent-awscli-kubectl-helm-3.2.3 . --build-arg HELM_VERSION=3.2.3

aws ecr get-login-password --region <region> | docker login --username AWS --password-stdin <account-id>.dkr.ecr.<region>.amazonaws.com

docker tag azure-agent-awscli-kubectl-helm-3.2.3:latest <account-id>.dkr.ecr.<region>.amazonaws.com/<repository>:<tag>

docker push <account-id>.dkr.ecr.<region>.amazonaws.com/<repository>:<tag>
Agent installation
File configuration
The agent is installed from a deployment (13) which will be similar to the example:
apiVersion: apps/v1
kind: Deployment
metadata:
  name: agent
  labels:
    app.kubernetes.io/name: azure-pipelines-agent
    app.kubernetes.io/instance: agent
spec:
  replicas: 1
  selector:
    matchLabels:
      app.kubernetes.io/name: azure-pipelines-agent
      app.kubernetes.io/instance: agent
  template:
    metadata:
      labels:
        app.kubernetes.io/name: azure-pipelines-agent
        app.kubernetes.io/instance: agent
    spec:
      containers:
        - name: azure-pipelines-agent
          image: "<account-id>.dkr.ecr.<region>.amazonaws.com/<repository>:<tag>"
          imagePullPolicy: Always
          env:
            - name: AZP_AGENT_NAME
              valueFrom:
                fieldRef:
                  apiVersion: v1
                  fieldPath: metadata.name
            - name: AZP_URL
              value: "https://dev.azure.com/<organization>"
            - name: AZP_POOL
              value: "<pool-name>"
            - name: AZP_TOKEN
              value: "<PAT>"
          volumeMounts:
            - mountPath: /var/run/docker.sock
              name: docker-volume

            - mountPath: /aws_config
              name: awsconfig-volume
      serviceAccountName: azure-agent
      volumes:
      - name: docker-volume
        hostPath:
          path: /var/run/docker.sock
      - name: awsconfig-volume
	configMap:
	name: awsconfig-configmap
Settings:
image: image of the agent that is going to use the deployment. The image uploaded to the ECR repository is usedAZP_URL:is the URL of the organization. If our organization is called “azure-example” it would look likevalue: "https://dev.azure.com/azure-example"AZP_POOL:is the name of the Agent Pool. If we use Default it would bevalue: "Default"AZP_TOKEN:is the PATserviceAccountName:serviceAccount to attach the role and give it permissions inside the clustername: awsconfig-volumeis theconfigMapused for the multicluster
The agent needs permissions within the cluster to be able to create, update and make changes to the different namespaces and services. For that we create the following ClusterRoleBinding (14).
apiVersion: rbac.authorization.k8s.io/v1
kind: ClusterRoleBinding
metadata:
  name: azure-agent
roleRef:
  apiGroup: rbac.authorization.k8s.io
  kind: ClusterRole
  name: cluster-admin
subjects:
- kind: ServiceAccount
  name: azure-agent
  namespace: azure-agent
In this case the ClusterRole cluster-admin (which has full-admin permissions) is attached to the ServiceAccount azure-agent.
The ClusterRole
cluster-adminhas maximum privileges in a cluster. It is recommended to give only the necessary permissions.
The serviceAccount looks as follows:
apiVersion: v1
kind: ServiceAccount
metadata:
  annotations:
    eks.amazonaws.com/role-arn:arn:aws:iam::<mgt-account-id>:role/azure-agent
  name: azure-agent
  namespace: azure-agent
To associate a role to the serviceAccount you can follow the following documentation (15). The role that we associate has permissions to assume the role in dev and also an allow S3:PutObject to be able to upload files to an S3 bucket.
Installation in the Cluster
Once we have the files configured we will use the following commands:
kubectl -f apply deployment-agent.yaml -n azure-agent
kubectl -f apply clusterrolebinding-agent.yaml -n azure-agent
kubectl -f apply serviceaccount-agent.yaml -n azure-agent
This installs the deployment in charge of creating azure agent pods.

Once the pod is running it should appear in the Agent Pool:


Pipeline creation
In the following section we create a two stage pipeline, Build and Deploy. The pipeline will build the service image and then deploy new changes to the service within the same cluster or another cluster. To understand the basics of how to create a pipeline you can take a look at the following documentation (16).
Build
To create the build stage we use 5 elements:
Kaniko: to build the image from the code and upload it to a repositoryS3: to temporarily save the context (code and so on inside the repository) of the serviceECR: to store the built imagesEKS cluster: to run the kaniko podBash: we will use Azure DevOps’s tasks to execute bash commands
The stage has a job which is configured to use the Agent Pool Default as follows:
stages:
  - stage: Build
    displayName: Build image
    jobs:
      - job: Build
        displayName: Build
        pool: Default
        steps:
In steps, the tasks to deploy the service build are configured. The basic flow is: compress the application context, upload the context to S3, create the kaniko deployment, execute the pod and wait for the build to finish.
The steps are explained below:
Context compression
The Bash task is used to compress the context and upload it to S3.
task: Bash@3
	inputs:
	  targetType: 'inline'
          script: |
	    cd $(Build.SourcesDirectory)
      tar -czvf /$(Build.SourceBranchName)_$(Build.BuildId).tar.gz .
      cp /$(Build.SourceBranchName)_$(Build.BuildId).tar.gz $(Build.SourcesDirectory)
			aws s3 cp $(Build.SourcesDirectory)/$(Build.SourceBranchName)_$(Build.BuildId).tar.gz s3://<bucket-name>/<folder>/$(Build.SourceBranchName)_$(Build.BuildId).tar.gz
Kaniko pod creation
In this task the kubernetes manifest of the pod is created.
- task: Bash@3
  inputs:
    targetType: 'inline'
    script: |
      #Create a deployment yaml to create the Kaniko Pod
      cat > deploy.yaml <<EOF
      apiVersion: v1
      kind: Pod
      metadata:
        name: kaniko-$(Build.BuildId)
        namespace: azure-agent
      spec:
        containers:
        - name: kaniko
          image: gcr.io/kaniko-project/executor:latest
          args:
          - "--dockerfile=Dockerfile"
          - "--context=s3://<bucket-name>/<carpeta-dentro-del-bucket>/$(Build.SourceBranchName)_$(Build.BuildId).tar.gz"
          - "--destination=<account-id>.dkr.ecr.<region>.amazonaws.com/<repository>:$(Build.SourceBranchName)_latest"
          - "--cache=true"
          - "--cache-repo=<account-id>.dkr.ecr.<region>.amazonaws.com/<repository>"
          volumeMounts:
          - name: docker-config
            mountPath: /kaniko/.docker/
        restartPolicy: Never
        serviceAccount: azure-agent-kaniko
        volumes:
        - name: docker-config
          configMap:
            name: docker-config
      EOF
Considerations:
image:kaniko’s image--context:address of the file within S3--destination: repository where the constructed image is stored--cache=true:the image is cached in the same repositorymountPath: /kaniko/.docker/volume with login required by kanikoconfigMap: name: docker-configthe configMap docker-config has the necessary configuration for kaniko to authenticate to the ECR
apiVersion: v1
kind: ConfigMap
metadata:
  name: docker-config
  namespace: azure-agent
data:
  config.json: |
{"credsStore":"ecr-login","credHelpers":{"<account-id>.dkr.ecr.<region>.amazonaws.com":"ecr-login"}}serviceAccount: azure-agent-kaniko serviceAccount with associated role for kaniko to have the following permissions: s3:GetObject and AmazonEC2ContainerRegistryPowerUser.
apiVersion: v1
kind: ServiceAccount
metadata:
  annotations:
    eks.amazonaws.com/role-arn:arn:aws:iam::<mgt-account-id>:role/azure-agent-kaniko
  name: azure-agent-kaniko
  namespace: azure-agent
Applying the manifest and building of the image
The Kubernetes@1 task is used to execute kubernetes commands. It is used to apply the deploy that creates the kaniko pod.
- task: Kubernetes@1
  inputs:
    connectionType: 'None'
    namespace: 'azure-agent'
    command: 'apply'
    arguments: '-f deploy.yaml'
    secretType: 'generic'
    forceUpdate: false
Wait for Kaniko
The last task is to wait for the kaniko pod to finish executing (build). The build may fail or run correctly so it is necessary to wait for that state to continue with the service deployment. In each iteration we will query the pod status and when there is a Succeeded or Failed we will print the result and stop or continue the pipeline.
task: Bash@3
  inputs:
    targetType: 'inline'
    script: |
      # Monitor for Success or failure

      while [[ $(kubectl get pods kaniko-$(Build.BuildId) -n azure-agent -o jsonpath='{..status.phase}') != "Succeeded" && $(kubectl get pods kaniko-$(Build.BuildId) -n azure-agent -o jsonpath='{..status.phase}') != "Failed" ]]; do echo "waiting for pod" && sleep 1; done

      # Exit the script with error if build failed
      if [ $(kubectl get pods kaniko-$(Build.BuildId) -n azure-agent -o jsonpath='{..status.phase}') == "Failed" ]; then
      exit 1;
      fi
Deploy
The second stage is in charge of deploying the new version of the service in its corresponding namespace using the tag of the newly created image.
It uses dependsOn and condition to ensure that the stage runs when the Build stage finishes and does it correctly. If the stage fails the service will not be deployed.
- stage: Deploy
    displayName: Deploy application
    dependsOn: Build
    condition: succeeded('Build')
    jobs:
      - job: Deploy
        displayName: Deploy
        pool: Default
        steps:
Choice of the cluster where to deploy
To use the multicluster configuration a Bash task is used with the following aws command:
- task: Bash@3
  inputs:
    targetType: 'inline'
    script: |
      aws --region <cluster-region> eks update-kubeconfig --name <cluster-name> --profile <awsconfig-configmap-profile>
With this command the /root/.kube/config file is modified to configure the credentials of the cluster where we want to deploy. The --profile flag is used to select the role to be assumed by the agent. The profile is obtained from ~/aws/config.
Install Helm Charts Repo
Then we install the helm chart repo where the helm charts of our services are stored.
- task: Bash@3
inputs:
  targetType: 'inline'
  script: |
    helm repo add <repo-name> <link-to-repo>
    helm repo update
Deploy service
To deploy the service we use the HelmDeploy task which allows to execute helm commands. We implemented this task using helm charts which can be consulted in the following documentations (18 and 19).
- task: HelmDeploy@0
  inputs:
    connectionType: 'None'
    namespace: '<namespace>'
    command: 'upgrade'
    chartType: 'Name'
    chartName: '<repo-name>/<service-chart>'
    chartVersion: '<service-version>'
    releaseName: '<service-name>'
    overrideValues: 'global.image.tag=$(Build.SourceBranchName)_$(Build.BuildId)'
    valueFile: '<values>'
    install: false
    waitForExecution: false
    arguments: '--timeout 0'
The overrideValues option is used to override the global.image.tag configured in the chart to use a desired tag.
Deletion of kube-config
When the deployment is finished, the /root/.kube/config file must be deleted so that the agent reconfigures the credentials of the mgt cluster. For that we use this last task:
- task: Bash@3
  inputs:
    targetType: 'inline'
    script: |
      rm /root/.kube/config
Scaling with KEDA
To implement the use of parallel jobs and agent scaling we are going to use KEDA. For this, it must be configured in the cluster so that every time there are pending jobs to be solved, new agents are created.
Azure-DevOps allows running parallel jobs in two ways: 1. In public projects. 2. By contracting parallel jobs on a monthly basis. The costs of the second option can be consulted in the following site (20).
Scaling configuration
To configure the scaling of the agents we are going to follow the documentation below (22) where we are going to install the manifest:
apiVersion: keda.sh/v1alpha1
kind: ScaledObject
metadata:
  name: azure-scaler
  namespace: azure-agent
spec:
  maxReplicaCount: 5
  minReplicaCount: 1
  scaleTargetRef:
    name: agent
  triggers:
  - metadata:
      organizationURLFromEnv: AZP_URL
      personalAccessTokenFromEnv: AZP_TOKEN
      poolID: "1"
    type: azure-pipelines
Considerations:
minReplicaCount/maxReplicaCount:minimum and maximum number of agent replicas that we want to be scaledorganizationURLFromEnv:reference to the url of the Azure Devops organization. This is the AZP_URL variable that is configured in the agent deploymentscaleTargetRef:is the name of the deployment that is going to scale based on the pending jobpersonalAccessTokenFromEnv:is the reference to the agent pool PAT. The AZP_TOKEN variable that is configured in the agent deployment is usedpool_ID:id of the agent pool where the agent is registered. To obtain it you can use the following method:
https://dev.azure.com/<organization>/_apis/distributedtask/pools?poolname=<pool-name>Once the manifest is created, we apply it in the cluster. It is applied in the same namespace as the agent.
kubectl apply -f scaleobject-keda.yaml -n azure-agentAutomatic scaling
Created the scaleObject you can scale the number of agents and run jobs in parallel.


References
- https://docs.microsoft.com/en-us/azure/devops/pipelines/get-started/what-is-azure-pipelines?view=azure-devops
- https://docs.microsoft.com/en-us/azure/devops/pipelines/agents/agents?view=azure-devops&tabs=browser
- https://docs.microsoft.com/en-us/azure/devops/pipelines/agents/pools-queues?view=azure-devops&tabs=yaml%2Cbrowser
- https://github.com/GoogleContainerTools/kaniko
- https://keda.sh/
- https://docs.aws.amazon.com/IAM/latest/UserGuide/id_roles.html
- https://docs.aws.amazon.com/IAM/latest/UserGuide/access_policies.html
- https://docs.microsoft.com/en-us/azure/devops/organizations/accounts/use-personal-access-tokens-to-authenticate?view=azure-devops&tabs=Windows
- https://docs.microsoft.com/en-us/azure/devops/pipelines/agents/v2-linux?view=azure-devops
- https://docs.microsoft.com/en-us/azure/devops/pipelines/agents/docker?view=azure-devops#linux
- https://aws.amazon.com/blogs/containers/enabling-cross-account-access-to-amazon-eks-cluster-resources/
- https://aws.amazon.com/es/ecr/
- https://kubernetes.io/docs/concepts/workloads/controllers/deployment/
- https://anote.dev/cluster-roles-and-cluster-roles-binding-in-kubernetes/
- https://docs.aws.amazon.com/eks/latest/userguide/iam-roles-for-service-accounts.html
- https://docs.microsoft.com/en-us/azure/devops/pipelines/get-started/key-pipelines-concepts?view=azure-devops
- https://github.com/helm/chartmuseum
- https://helm.sh/docs/chart_template_guide/getting_started/
- https://craftech.io/blog/one-chart-to-rule-them-all-how-to-implement-helm-subcharts/
- https://azure.microsoft.com/es-es/pricing/details/devops/azure-devops-services/
- https://keda.sh/docs/2.6/deploy/#helm
- https://keda.sh/docs/2.3/scalers/azure-pipelines/
What is Craftech?
Craftech is a reliable, nimble and experienced infrastructure development group. Our team only consists of top level engineers, designers and managers. Craftech relies on the use of the latest accelerated development methodologies, tools, technologies and processes to deliver excellence in our solutions, communication and client experiences.
If you have any questions/problems here, please feel free to join us on Craftech’s community Slack and ask around.